
Stainless Steel Surface Finishing: Ra Values & Methods Guide — ZEMSS

Stainless Steel Surface Finishing: From Mill Finish to Mirror Polish — Ra Values, Methods & Applications

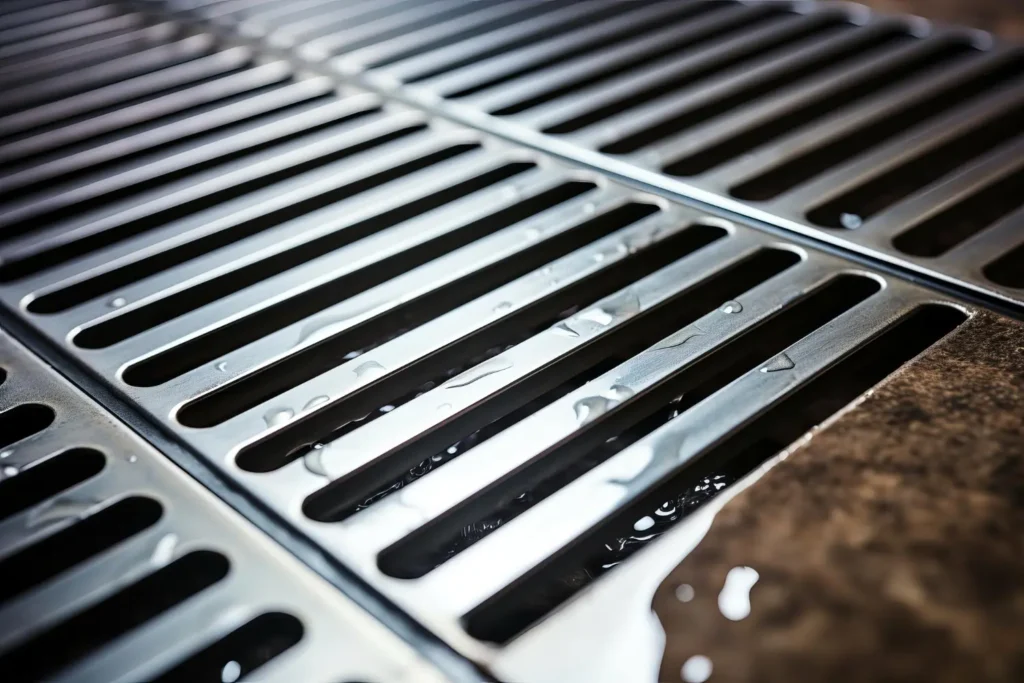
Stainless steel surface finish samples from mill to mirror polish comparison
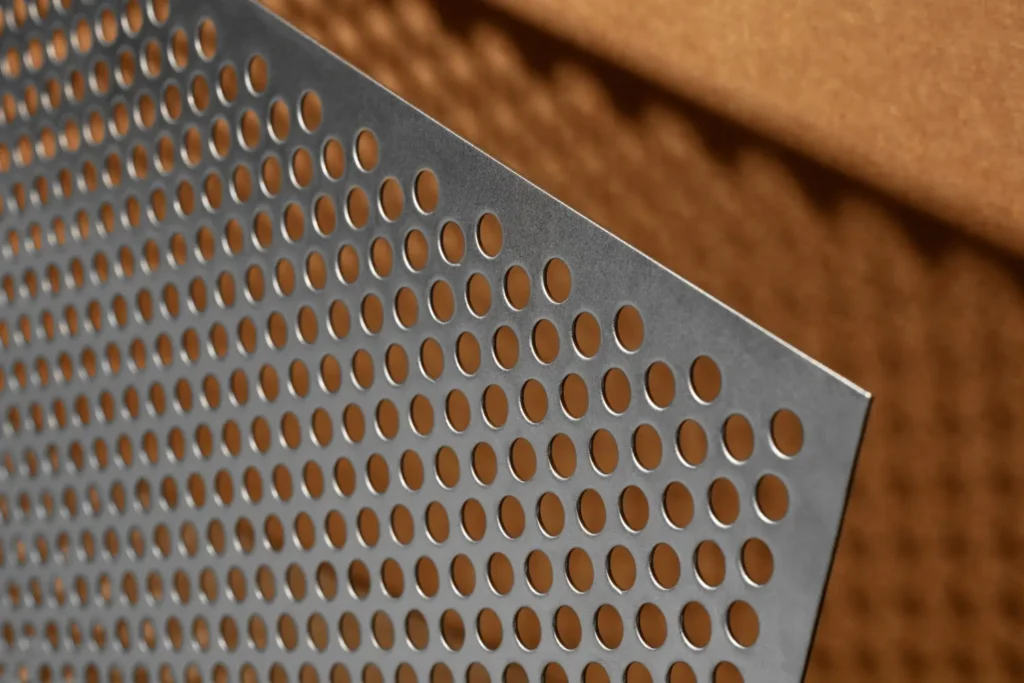
Electropolishing process for stainless steel parts in chemical bath
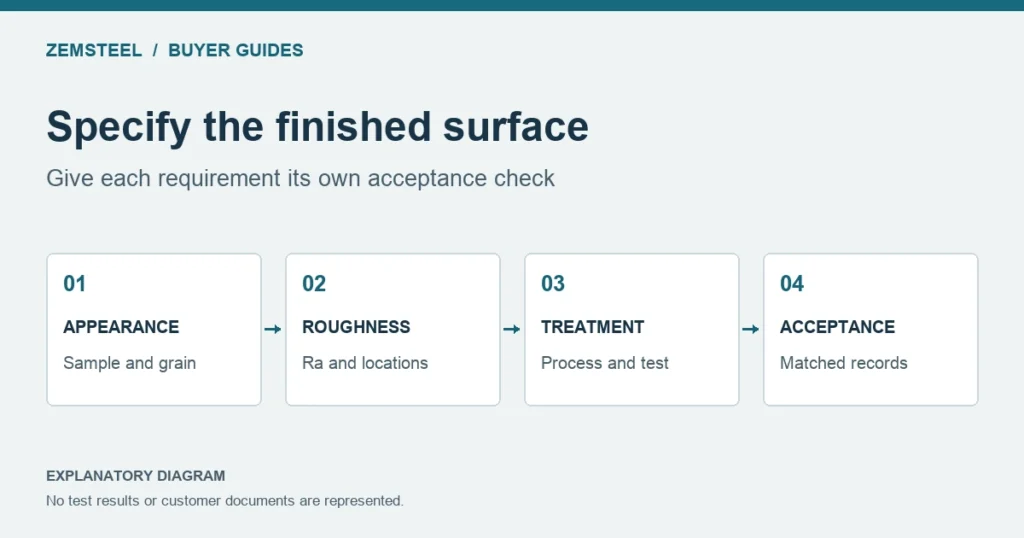
Surface roughness Ra values comparison chart for stainless steel

Stainless steel surface finishing is far more than a cosmetic choice — it directly determines corrosion resistance, cleanability, bacterial adhesion, and product performance in service. Whether you are specifying a tank for pharmaceutical processing, a pressure vessel for chemical reactors, or architectural cladding for a coastal facade, the surface finish governs how the material behaves over its entire lifecycle. At ZEMSS, our factory has delivered thousands of finished stainless steel fabrications across food, chemical, pharmaceutical, and marine industries, and surface finish specification is consistently one of the most critical — and most misunderstood — decisions in the procurement process. This stainless steel surface finishing guide covers everything from mill-supplied finishes to ultra-high-purity mirror polishing, including Ra values, process comparisons, industry requirements, and quality verification methods.

Understanding Surface Roughness (Ra)

Surface roughness is the measure of fine irregularities on a material’s surface — the microscopic peaks and valleys left by the manufacturing or finishing process. For stainless steel, roughness directly affects how easily contaminants adhere, how thoroughly the surface can be cleaned, and how resistant it is to pitting and crevice corrosion.

Ra (Roughness Average): The arithmetic mean of the absolute deviations of the surface profile from the mean line over a specified sampling length. Expressed in micrometers (μm) or microinches (μin). In simple terms: the smaller the Ra number, the smoother the surface. Ra is defined by ISO 4287 and is the most widely used roughness parameter in the stainless steel industry.

How Surface Roughness Is Measured

Ra is typically measured with a contact profilometer — a diamond-tipped stylus that traverses the surface and records vertical displacement. Modern optical profilometers use laser interferometry for non-contact measurement on polished or delicate surfaces. For shop-floor verification, surface roughness comparators — physical reference samples with known Ra values — allow visual and tactile comparison. In formal quality control, measurements follow ASTM A480 for flat-rolled stainless steel and ISO 4287 for general surface texture parameters.

Typical Ra Ranges by Process

Process Ra Range (μm) Ra Range (μin) Description
Hot-rolled (No.1) 3.2 – 12.5 125 – 500 Rough, scaled surface
Cold-rolled 2B 0.2 – 0.5 8 – 20 Smooth matte; standard industrial
Bright Annealed (BA) 0.1 – 0.3 4 – 12 Reflective without polishing
Brushed / Satin (No.4) 0.5 – 1.6 20 – 63 Grained; architectural standard
Fine Satin (No.6) 0.2 – 0.5 8 – 20 Soft, low-reflectivity luster
Mirror Polish (No.8) ≤ 0.1 ≤ 4 Highly reflective; pharmaceutical grade
Electropolished ≤ 0.5 ≤ 20 Bright, passivated, crevice-free
Bead Blasted 2.0 – 6.3 80 – 250 Uniform matte; satin-peened

Mill Finishes: 1D, 2D, 2B, and BA Explained

Mill finishes are the surface conditions produced at the steel mill — before any secondary processing, polishing, or coating. Understanding these designations is the starting point for any surface finishing specification, because the mill finish determines how much work is needed (and what it costs) to reach your target surface.

1D Finish — Hot-Rolled, Annealed, Pickled

Process: Hot-rolled to thickness, annealed (heat-treated to soften), then pickled in acid to remove mill scale. No further rolling or finishing.
Ra Range: 3.2 – 12.5 μm (125 – 500 μin)
Appearance: Dull gray with a rough, pitted texture. Mill scale removal leaves a non-uniform surface.
Typical Applications: Structural components, industrial equipment where appearance is not critical, thick-gauge parts (≥ 4mm) destined for subsequent machining or surface preparation. Commonly specified when the part will be fully machined or clad. At our ZEMSS processing facility, we often start with 1D when fabricating heavy-walled chemical vessels where the surface will receive a subsequent mechanical polish.

2D Finish — Cold-Rolled, Annealed, Pickled

Process: Cold-rolled (after hot rolling), annealed, and pickled. The cold-rolling step reduces thickness and improves surface quality, but without a final skin pass the surface remains slightly dull.
Ra Range: 0.3 – 0.8 μm (12 – 32 μin)
Appearance: Matte silver-gray, smoother than 1D but non-reflective.
Typical Applications: Industrial enclosures, internal tank components, parts that will be further formed or deep-drawn. Less common in modern procurement; 2B has largely replaced 2D for most applications.

2B Finish — Cold-Rolled, Annealed, Pickled, Skin-Passed

Process: Identical to 2D, with an additional light cold-rolling pass (skin pass) on polished rolls. This final pass improves flatness, surface uniformity, and brightness.
Ra Range: 0.2 – 0.5 μm (8 – 20 μin)
Appearance: Smooth, uniform matte gray. The most common stainless steel surface finish worldwide.
Typical Applications: General industrial equipment, stainless steel storage tanks for non-sanitary service, architectural interiors, commercial kitchen equipment, and as the substrate for brush polishing (No.4). This is our default mill finish at ZEMSS unless otherwise specified — it provides an excellent balance of surface quality and cost, and serves as a reliable base for all secondary finishing processes.

BA Finish — Bright Annealed

Process: Cold-rolled, then annealed in a controlled-atmosphere furnace (hydrogen/nitrogen mix) that prevents oxidation. No pickling required — the surface emerges bright and oxide-free directly from annealing.
Ra Range: 0.1 – 0.3 μm (4 – 12 μin)
Appearance: Bright, reflective, mirror-like. Closest to a polished surface achievable directly from the mill.
Typical Applications: Automotive trim, appliances, architectural decorative panels, medical devices, and applications where a bright, clean surface is needed without additional polishing. BA is more expensive than 2B but can eliminate polishing costs entirely for many applications.

ZEMSS Factory Note: When specifying mill finishes, always communicate both the finish designation AND the required Ra value. A “2B” from one mill may have an Ra of 0.25μm while another produces 0.45μm. We verify Ra on every incoming coil using calibrated profilometry and maintain traceability records for each project.

Surface Finish Grades & Ra Values: No.1 to No.8

The following table provides the definitive reference for stainless steel surface finish grades, from the roughest hot-rolled condition to the ultra-fine mirror polish used in semiconductor and pharmaceutical applications.

Grade Name Process Ra (μm) Ra (μin) Cost Tier Typical Use
No.1 Hot-Rolled, Annealed, Pickled HR + anneal + acid pickle 3.2 – 12.5 125 – 500 1 (lowest) Structural, industrial equipment, thick plate
No.2D Cold-Rolled, Annealed, Pickled CR + anneal + pickle (no skin pass) 0.3 – 0.8 12 – 32 2 Deep-drawing, general industrial
No.2B Cold-Rolled, Skin-Passed CR + anneal + pickle + skin pass 0.2 – 0.5 8 – 20 2 General fabrication, tanks, enclosures
No.3 Intermediate Polish Polish with 100-120 grit 0.8 – 1.6 32 – 63 3 Food equipment, where grain direction matters less
No.4 Brushed / Satin Polish with 150-240 grit 0.5 – 1.6 20 – 63 3 Architectural, food processing, dairy, hospitality
No.5 Refined Satin No.4 + fine buffing 0.2 – 0.5 8 – 20 4 Architectural interiors, retail displays
No.6 Fine Satin / Low-Luster Tampico brush + fine compound 0.2 – 0.5 8 – 20 4 Architectural columns, handrails, decorative
No.7 High-Luster Polish Progressive polish to 320+ grit + buff 0.1 – 0.25 4 – 10 5 Pharmaceutical, high-purity water systems
No.8 Mirror Polish Progressive polish to 600+ grit + color buff ≤ 0.1 ≤ 4 5 (highest) Pharma, semiconductor, aesthetic architectural

Mechanical Polishing: Brushed vs. Mirror Finish

Mechanical polishing uses abrasive media — belts, wheels, discs, or pads — to progressively remove material and refine the surface. It is the most common method for achieving controlled surface finishes on stainless steel fabrications, from utilitarian brushed surfaces to mirror-grade pharmaceutical finishes.

Brushed Finish (No.4 / Satin)

A brushed finish produces a uniform, directional grain pattern with Ra typically in the range of 0.5 – 1.6 μm (20 – 63 μin). At ZEMSS, our brushing process follows these steps:

  1. Surface Preparation: If starting from 2B or 2D mill finish, the surface is cleaned and degreased. Any weld seams are ground flush to the parent material.
  2. Coarse Abrasion: 120-180 grit abrasive belt removes mill marks, minor surface defects, and grinding marks. This establishes a uniform texture.
  3. Fine Graining: 220-240 grit belt or drum produces the final directional grain. The direction of the grain is carefully controlled — continuous, parallel lines provide the most aesthetically consistent result. For food processing equipment, the grain direction is oriented vertically to promote drainage.
  4. Finishing Pass: A non-woven abrasive pad (Scotch-Brite or equivalent) softens the grain and produces a uniform satin luster.

Typical cost: Brushing adds approximately 15-30% to the base material cost, depending on part complexity and grain specification. Flat sheets and simple geometries are significantly easier to brush than complex fabrications with corners, nozzles, and welded attachments.

Mirror Polish (No.8)

A mirror polish (Ra ≤ 0.1 μm / 4 μin) demands progressive mechanical polishing through increasingly fine abrasives, followed by buffing with polishing compounds. The process is labor-intensive and requires skilled operators — each polishing stage must fully remove the scratches left by the previous, coarser stage. Skipping a grit step will leave deeper scratches that become glaringly visible in the final mirror finish.

  1. Pre-Grind: Flatten and remove all weld beads and surface irregularities. 60-80 grit if starting from weld condition.
  2. Intermediate Polishing: Sequential passes at 120, 180, 240, 320, and 400 grit. At each stage, the operator inspects the surface under directional light to confirm that all previous-grit scratches are removed.
  3. Fine Polishing: 500-600+ grit abrasive belts or discs. The surface begins to show reflectivity.
  4. Buffing / Color Buff: Cotton or sisal buffing wheels charged with polishing compound (alumina or chrome oxide) produce the final mirror luster. This is the most skill-dependent step — too much pressure burns the surface; too little leaves haze.

Typical cost: Mirror polishing can add 100-300%+ to the base fabrication cost. Each square meter of mirror-polished surface requires 30-90 minutes of skilled labor. This is why intelligent specification — applying mirror polish only where functionally necessary — is one of the most effective cost-control strategies in stainless steel fabrication. For pharmaceutical process vessels, we typically specify No.7 (Ra 0.15-0.25μm) for wetted surfaces and No.4 (brushed) for non-product-contact surfaces — achieving the required cleanability without the full cost of No.8.

Chemical Treatments: Pickling, Passivation, and Electropolishing

While mechanical polishing physically removes material to create a smooth surface, chemical treatments serve different and complementary purposes — removing contamination, restoring the passive chromium oxide layer, and in the case of electropolishing, achieving both smoothing and passivation simultaneously.

The Passive Layer: Stainless steel resists corrosion because of a self-healing chromium oxide (Cr₂O₃) film — the “passive layer” — that forms spontaneously when the surface is exposed to oxygen. This layer is only 2-5 nanometers thick but is the sole reason stainless steel is “stainless.” Any process that damages this layer (welding, grinding, machining) or contaminates the surface with free iron must be followed by passivation to restore corrosion resistance.

Pickling

What it removes: Heat tint (chromium-depleted oxide scale from welding), weld burn, and surface iron contamination.
When to use: After welding or hot-forming operations. Pickling is essential because the heat-affected zone (HAZ) of a stainless steel weld has a chromium-depleted layer that will corrode rapidly if not removed. The visible blue-brown “heat tint” band around every weld is the visual indicator of this condition.
Process: Immersion in or application of a pickling paste/gel containing nitric acid (HNO₃) and hydrofluoric acid (HF), typically 10-20% HNO₃ + 1-5% HF. The acid dissolves the chromium-depleted oxide scale and a thin layer of the underlying metal. Typical duration: 15-60 minutes, followed by thorough water rinsing.
Cost: Moderate. Pickling paste is applied locally to weld zones; full-immersion pickling for complete fabrications adds material cost but is essential for chemical industry equipment where any heat tint is unacceptable.

Passivation

What it removes: Free iron and other surface contaminants from fabrication. It does NOT remove heat tint — a common and costly misunderstanding.
When to use: After machining, grinding, or forming operations that may have embedded free iron particles into the stainless steel surface. Also used after pickling as a final treatment step.
Process: Immersion in nitric acid (20-50% HNO₃) or citric acid (4-10%) solution. The acid dissolves surface iron without attacking the chromium. The chromium immediately reacts with oxygen to form the passive layer. Citric acid passivation has gained significant adoption because it is safer, more environmentally friendly, and equally effective per ASTM A967.
Cost: Low. Passivation is the most cost-effective corrosion-prevention treatment and should be specified for virtually every stainless steel fabrication that will see corrosive service.

Electropolishing

Electropolishing: An electrochemical process in which the stainless steel part is immersed in an electrolyte bath (typically phosphoric + sulfuric acid) and connected as the anode (positive). When current is applied, material is dissolved from the surface at a controlled rate (typically 20-40μm removed). Peaks dissolve faster than valleys, producing a leveling effect that reduces Ra while simultaneously enriching the surface chromium-to-iron ratio.

What it achieves:

  • Ra reduction to ≤ 0.5 μm (down to 0.1 μm on optimized processes) — smoother than most mechanical polishes for complex geometries
  • 30-50% improvement in surface chromium-to-iron ratio (from ~1:5 to ~1:2) — significantly superior corrosion resistance vs. mechanical polish
  • Crevice-free surface: Unlike mechanical polishing, electropolishing reaches every exposed surface including internal pipe bores, thread roots, corners, and blind holes — anywhere the electrolyte can contact
  • Improved pitting resistance equivalent (PRE) improvement of 15-30%
  • Removal of embedded iron, machining burrs, and micro-cracks

When to use: Electropolishing is the gold standard for pharmaceutical WFI (Water for Injection) systems, bioprocessing equipment, semiconductor gas delivery systems, and ultra-high-purity applications. It is also increasingly specified for food processing equipment where CIP (Clean-in-Place) effectiveness must be validated.

Pickling vs. Passivation vs. Electropolishing: Comparison

Parameter Pickling Passivation Electropolishing
Removes heat tint? Yes — primary purpose No — will NOT remove scale Yes — removes scale + surface layer
Removes free iron? Yes Yes — primary purpose Yes
Reduces Ra? No — may slightly roughen No — no surface profile change Yes — typically 40-60% Ra reduction
Enriches Cr:Fe ratio? No No — restores, does not enhance Yes — 30-50% improvement
Reaches internal surfaces? Yes (immersion only) Yes (immersion) Yes — electrolyte contacts all wetted surfaces
Relative Cost Medium Low High (2-5× passivation)
Typical Sequence After welding/fabrication Final treatment after all operations After polishing; final step before packaging
ZEMSS Process Rule: The correct sequence is always Pickling → Mechanical Polish (if required) → Electropolish (if specified) → Passivation → Cleanroom packaging. Never passivate before pickling — the passive layer will simply be stripped off. If electropolishing is specified, passivation is redundant because electropolishing produces a superior passive layer on its own.

Surface Finish Selection by Industry

Different industries impose fundamentally different surface finish requirements, driven by regulatory standards, cleanability needs, corrosion exposure, and budget. The table below summarizes the most common specifications across major stainless steel end-user sectors.

Industry Typical Finish Ra Target (μm) Rationale
Food Processing No.4 / 2B + polished welds 0.5 – 1.6 Cleanability per 3-A Sanitary Standards; grain direction vertical for drainage; electropolish optional for CIP systems
Dairy No.4 internal, 2B external ≤ 0.8 (internal) 3-A Standard 01 requires Ra ≤ 0.8μm (32 μin) on product contact surfaces
Pharmaceutical No.7 / Electropolished ≤ 0.4 (WFI ≤ 0.5) ASME BPE standard; crevice-free for CIP/SIP; electropolishing eliminates micro-roughness that harbors bacteria
Chemical Processing 2B + pickled + passivated 0.2 – 0.5 Corrosion resistance prioritized over aesthetics; full-immersion pickling for pitting-sensitive alloys (316L, duplex)
Semiconductor / UHP Electropolished (EP) to No.8 ≤ 0.1 – 0.25 SEMI standards; surface roughness directly affects particle generation and gas adsorption
Architectural (Interior) No.4 / No.6 / No.8 0.2 – 1.6 Visual consistency paramount; fingerprint resistance desired; grain direction continuity across panels
Architectural (Exterior) No.4 / Bead Blast + passivate 0.5 – 1.6 Pitting resistance critical (especially coastal); Mo content (316L preferred); rougher finishes hide environmental staining better
Marine / Offshore 2B + passivated or pickled + passivated 0.2 – 0.8 316L or duplex mandatory; chloride pitting is the dominant failure mode; crevice-free design + surface passivation

Welding & Surface Finish

Welding is the most significant surface-finish disruptor in stainless steel fabrication. Almost every welded stainless steel fabrication requires some form of post-weld surface treatment — the only question is which treatment and to what extent.

How Welding Damages the Surface

Sugaring: A severe form of weld oxidation that occurs on the backside (root) of stainless steel welds when the shielding gas is inadequate or absent. The surface develops a dark, granular, heavily oxidized crust that is deeply chromium-depleted and riddled with microscopic crevices. Sugaring cannot be simply cleaned off — the affected material must be ground away entirely, often requiring weld repair if penetration is compromised.

When stainless steel is welded, the heat-affected zone (HAZ) on both sides of the weld experiences temperatures high enough (400-900°C) to cause chromium carbides to precipitate at grain boundaries — a phenomenon called sensitization. This chromium-depleted zone corrodes preferentially, and the visible “heat tint” (colored oxide film ranging from straw-gold through blue to dark gray) is the telltale sign. The darker the tint, the more severe the chromium depletion.

Additional welding surface issues include:

  • Weld spatter: Molten metal droplets that adhere to the surface, creating localized roughness and potential crevice corrosion initiation sites
  • Undercut: A groove melted into the base metal adjacent to the weld toe — creates a stress riser and crevice
  • Weld reinforcement: Excess weld metal above the surface plane that must be ground flush for sanitary or smooth-flow applications
  • Arc strikes: Accidental arc contact outside the weld zone creates a localized hardened spot susceptible to corrosion

Achieving Flush Welds

For sanitary, pharmaceutical, and high-purity applications, weld seams must be ground flush with the surrounding surface and polished to match the base metal finish. The process sequence is:

  1. Purge welding: The interior of tubes and vessels is purged with argon during welding to prevent sugaring. This is non-negotiable for any sanitary or high-purity application.
  2. Rough grinding: 60-80 grit flap disc or belt removes weld reinforcement down to the surface plane. Careful technique prevents gouging the surrounding base metal.
  3. Blending: 120-180 grit progressively blends the ground area into the surrounding surface, feathering the transition.
  4. Finish matching: Final grit matches the surrounding finish — 220-240 grit for No.4 brushed, progressive to 400+ for polished surfaces.
  5. Inspection: Dye penetrant testing (see Quality Verification section) confirms the ground area is free of cracks, pits, and incomplete fusion.

At ZEMSS, all our welders are qualified to ASME Section IX, and our post-weld treatment protocols are validated for each project’s specific surface finish requirements. We maintain weld maps and treatment records as part of the final documentation package.

Quality Verification: How to Confirm Surface Finish Compliance

Surface finish quality cannot be verified by eye alone. Even experienced inspectors cannot reliably distinguish between Ra 0.3μm and Ra 0.5μm by visual inspection — and that 0.2μm difference can be the distinction between passing and failing a pharmaceutical validation audit. A systematic verification approach is essential.

1. Profilometer Measurement (Quantitative)

A contact profilometer with a 2-5μm radius diamond stylus is the standard instrument for Ra measurement. Key measurement practices:

  • Sampling length (cutoff λc) of 0.8mm for Ra 0.1-2.0μm, 2.5mm for Ra 2.0-10μm per ISO 4288
  • Evaluation length of 5× the sampling length (typically 4mm for stainless steel finishes)
  • Multiple traces: Minimum 3 measurements at different locations; for fabrications, measure on flat surfaces, near welds, and on curved sections
  • Calibration verification: Profilometer calibrated against a certified reference standard before and after each measurement session

2. Visual Inspection Standards

Visual inspection remains the primary method for detecting surface defects — scratches, pits, staining, inconsistent grain, and contamination. Industry-standard inspection conditions:

  • Illumination: Minimum 500 lux (50 foot-candles) at the surface; for mirror finishes, directional lighting at 45° angle reveals haze and micro-scratches invisible under diffuse light
  • Distance: No closer than 600mm (24 inches) for general finish; 300mm (12 inches) for pharmaceutical-grade finishes
  • Reference standards: Physical surface roughness comparators provide side-by-side tactile and visual reference
  • Documentation: Photographic records with scale reference for each finished surface, particularly for pharmaceutical and architectural projects

3. Dye Penetrant Testing (for Surface-Breaking Defects)

Dye penetrant inspection (DPI) is a non-destructive test that detects surface-breaking defects — cracks, pinholes, laps, and incomplete fusion — that are invisible to the naked eye. While primarily used for weld integrity, DPI is also valuable for verifying surface quality on polished and electropolished surfaces where micro-cracks or pits would compromise cleanability and corrosion resistance.

The process: A low-viscosity penetrant dye (typically red) is applied to the surface and allowed to dwell (10-30 minutes). Capillary action draws the dye into any surface-breaking discontinuities. Excess dye is removed, and a white developer is applied that draws dye back out of defects, creating a visible red indication. Sensitivity levels range from standard (detects ~1μm width flaws) to ultra-high for critical aerospace and semiconductor applications.

ZEMSS Quality Documentation Package

Every fabrication leaving our factory with a specified surface finish receives:

  • Profilometer measurement records (3+ traces per defined inspection area)
  • Photographic documentation under controlled lighting
  • Treatment certificates for chemical processes (pickle/passivation bath analysis, electropolish parameters)
  • DPI reports for all weld zones (when specified)
  • Surface finish traceability to raw material heat number

Frequently Asked Questions

What is the difference between 2B and BA stainless steel finish?

2B is a cold-rolled, annealed, pickled, and skin-passed finish with a matte-gray appearance and Ra 0.2-0.5μm. BA (Bright Annealed) is cold-rolled and annealed in a controlled-atmosphere furnace, producing a bright, reflective surface with Ra 0.1-0.3μm without additional polishing. BA is more expensive per square meter but can eliminate downstream polishing costs entirely for applications needing a bright, reflective surface from the mill. For deeply formed parts, note that BA’s bright surface may show stretch marks and orange peel more visibly than the forgiving matte of 2B.

What Ra value is considered mirror polish for stainless steel?

A true mirror polish (No.8 finish) on stainless steel typically achieves Ra ≤ 0.1μm (4 μin). In practice, Ra ≤ 0.25μm (10 μin) is often accepted as “mirror-grade” for pharmaceutical and food contact applications. The distinction matters because achieving Ra 0.1μm vs. Ra 0.25μm can double the polishing labor — and both will appear mirror-like to the naked eye. Always specify the Ra target numerically, not just the No.8 label, which is a visual description, not a quantitative standard. Reference: ASTM A480-24 and ASME BPE for industry-specific Ra requirements.

What is electropolishing and when should it be used instead of mechanical polishing?

Electropolishing is an electrochemical process that selectively dissolves high points on the surface in an acid electrolyte bath, achieving both leveling (Ra reduction) and chromium enrichment simultaneously. Use electropolishing instead of — or in addition to — mechanical polishing when: (1) the part has complex internal geometry (pipe bores, elbows, tank interiors) that mechanical tools cannot reach; (2) the application demands maximum pitting resistance (pharma WFI, semiconductor gas); (3) crevice-free surface is mandatory (no micro-crevices from abrasive grain embedding); or (4) you need to remove a defined surface layer to eliminate embedded contamination from prior fabrication steps.

How does welding affect stainless steel surface finish?

Welding creates heat tint (chromium-depleted oxide scale) across a band 3-15mm wide on either side of the weld, spatter, potential sugaring on un-purged weld roots, and surface irregularities from the weld bead. All of these compromise corrosion resistance and cleanability. Post-weld treatment is mandatory: pickling removes heat tint and chromium-depleted metal; subsequent passivation restores the passive layer. For sanitary service, welds must be ground flush and polished to match the surrounding surface Ra. This is not optional — un-treated weld zones can corrode within hours in chloride-containing environments, even on 316L stainless steel.

Specify Surface Finishes With Confidence — Partner With ZEMSS

Surface finish is not an afterthought — it is a primary design parameter that determines how your stainless steel equipment performs, how long it lasts, and whether it meets regulatory compliance. At ZEMSS, surface finishing is not something we subcontract. Every step — mechanical polishing from No.3 through No.8, chemical pickling and passivation, electropolishing, and post-weld treatment — is performed in-house under our quality management system. This means your surface finish is controlled, traceable, and guaranteed from raw material to final inspection.

Get a Quote for Your Stainless Steel Fabrication

Tell us your material grade, dimensions, and surface finish requirements. Our engineering team will provide a detailed quotation including Ra verification documentation, treatment certifications, and full material traceability.

Email: [email protected] | Explore our capabilities: Processing Services | Fabricated Products